Wednesday, June 25, 2014

How to Install Cabinet Doors On an Armoire or Bookcase

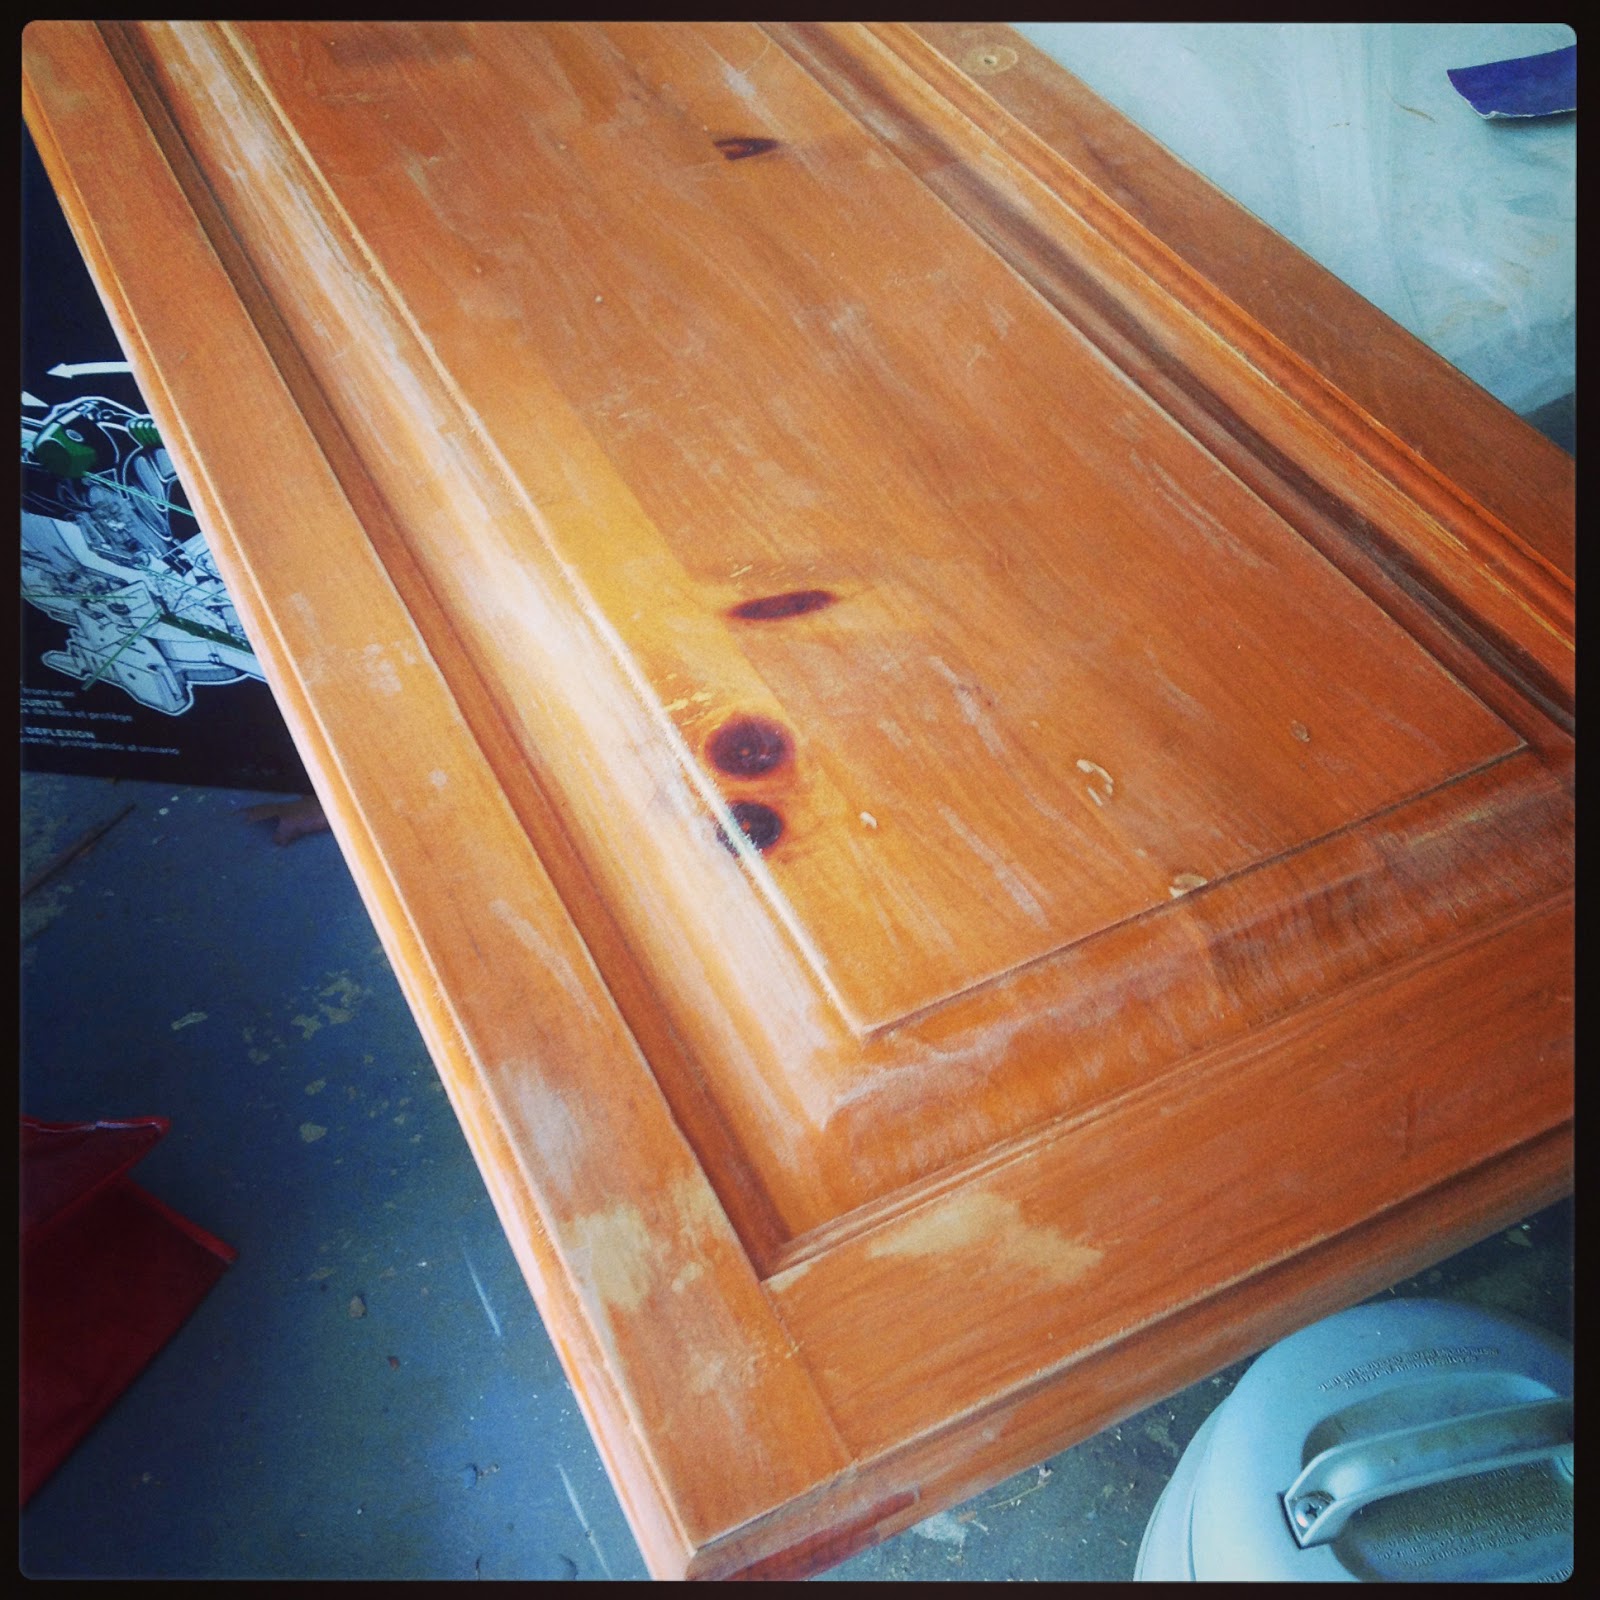
I told you all in my last post here that I have finally been getting to all those "diamonds in the rough" gathering dust in my studio. Today's post is a piece of all that productivity. I will tell you more about the armoire itself in a later post, where I reveal it in all it's finished and staged glory. It has a great story and I'm doing the coolest stuff to it. But today we're just gonna learn how to fix the doors of an old, busted up, hand-me-down armoire. This would also work to attach new doors onto an existing bookcase, as long as both doors and bookcase are made of wood.

Let's just jump right in:

1. Find, buy, or "inherit" a junky, beat up wood armoire. This is actually the easy part. With the advent of flat screened TVs people are dumping really great, solid wood armoires on Craigslist for a song. Which makes no sense to me, because armoires are one of the most versatile pieces of furniture out there. Drill a few holes to add another shelf or two across that giant gap for the TV, and you have some seriously amazing hidden storage. Books, toys, extra clothing, towels, cleaning supplies. You name it, an armoire can hold it.

As you can see, mine is nothing super thrilling. But it holds all my random staging things and my awesome globe and favorite decorating books. When I got it, the doors were installed incorrectly and hung wonky, so I just took them off, filled them in with wood putty and started over. I now wish I had also filled the holes with toothpicks or wooden kitchen skewers, cut to the depth of the hole and then puttied. The extra wood reinforces the hole, so if you end up screwing the doors into the same hole, the new screw has actual wood to bite into. It will give you much more support than just wood putty.

2. Buy, find or make your doors, if you are using a bookcase, or installing new doors on an armoire that didn't have them before. Flat 3/4in plywood would work fine for this. Ikea sells doors to retro fit onto it's book cases. The Habitat For Humanity Restore or a local savage yard might even have doors you could retrofit to work here.

If you are using plywood, and you have taken all your measurements carefully, you could even have the guys at Home Depot or Lowes make your cuts for you. Smile pretty and say "please" if they give you a hard time. I find it helps to go when they aren't super busy if you want a lot of cuts made.

You will also need to buy at least 2 large (2-3 in) metal hinges for each door. Think in terms of shelves that fit in the segment you are building. If the door is large enough to cover 3 shelves, get 3 hinges for that door. My top doors had 3 hinges. My bottom ones had two. If you are doing two really long doors for a book case, 3 hinges per door will probably do you fine.

And you will need to get enough screws to attach each hinge to both the cabinet door and the armoire. Look at the hinge and count the holes. Buy that many screws for each hinge. I used 3/4 in and 1/2 in #6 zinc plated sheet metal screws.

3. If you plan on painting the armoire and the doors and the hinges, do it now. This may sound like an odd time to do this, but I find everything is much easier to paint when it is separate. I spray paint and prime my hinges. It's just easier. Be aware though, hinges move, so some of the paint is going to wear off. If you can deal with it, you might consider painting your brass hinges darker, rather than lighter. Oil rubbed bronze hides the rubbing much better than white does.

That said, I painted my hinges white and will be touching them up with chalk paint after the door are on. Why would I take my own good advice?


4. Figure out where you want the hinges to be on the door. I love watching wood working vids on YouTube and the rule of thumb from all the wood working guys on YouTube is that you want to line the hinge up visually with inner edge of the door cross boards. See how my Lovely Assistant is pointing to the section just below where the cross piece intersects with the side piece? That's where the You Tube guys tell you to put the hinge. But it's your door. Put it where ever you think it looks best, keeping in mind it has to shut easily and bear the weight of the door evenly.


See how the hinge is lined up with the groove? And pushed flush with the side of the door? This is what the hinge looks like when it's closed. The hinges shown 3 pics up are open, just to give you some perspective on how they fit on the door. How your hinge fits depends on the hinge you choose to use. These are what came with the armoire.


This is how the hinges line up on the front. See how the rounded top of the opening mechanism lines up with where the smaller molding stops? It's just kind of happy for your eyes if you do it like that.


For those of you using plywood, or who feel better when you measure things, I didn't take the hinges off the top doors. The top hinges came installed 3 in down from the top and 3 in up from the bottom. The YouTube guys also said that was standard.

If you have a third hinge, measure the distance between your top and bottom hinge and divide it by two. Use that amount and measure up or down from your other hinge and install the third one there.


5. Mark where your hinges will go. I use a regular pencil for this. Also, if your hinges have oblong holes like mine (these are used to adjust the door to be able to shut easily), I always make my mark right dead center, so I have some wiggle room if I'm wrong. This technique has saved me on more than one occasion.

It's up to you whether you mark all your hinges at the same time. Or mark one and then install it. Both approaches have merit. I marked one, then installed that one and then marked and installed the next one on the same door.


6. Drill your holes. I am a bit of a coward when it comes to drilling into things I can't go all the way through. So I used the smallest bit I had. It really is the smallest one I own.

Just keep in mind that unless you are using some humongous screw, all you need to do is give your screw a start in the wood.


Here is the size of my screw vs. the size of my drill bit. You want to go at least one size smaller than the screw.
And be sure BEFORE you start screwing, that your screws are shorter than your door is thick. For example, use 1/2 in screws with 3/4 in plywood. When in doubt, hold the screw up to the side of the wood. If the screw is shorter, you're good.You don't want to have the tops of screws showing through the front of the door..

7. Once your holes are drilled, screw in your hinge. I prefer to use a hand screw driver for this. I know a ton of people who use their power drills, but I find that tends to strip my screws. and it makes it a pain to make adjustments later, if they are screwed down that tightly. But it all works. Do what makes you happiest. If you love your power tool, have at it!


8. Once all the hinges are on one door, make sure they are in the same place on the opposite door. This is actually a really important step. Your armoire will look totally stupid if your hinges don't line up visually. And it can affect whether the doors line up and hang nicely as well. You can measure to do this if you want, but I found it easier just to line up the doors and make sure the hinges were in the same place on the doors.


Once things are all lined up, mark and screw things into place.

Repeat this process on any other sets of door. I got off easy here. The top doors were fine, so I just left the hinges where they were, and just redid the armoire side of things.


9. Measure the space the doors will be covering. You have hopefully already done this if you made your own doors. But the rest of us need to catch up.

Don't you love my Lovely Assistants? I am a big fan of putting Rising 9th Graders to work if they are interrupting my posting with their out of school-ness. Plus I couldn't shoot the pics and hold the tape measure. And they are super cute.

See how I measured from the base, not including the molding, to the bottom of the top molding? That is the range your doors can cover. You need to figure out where you want them.

Since my bottom doors are starting right at the base and have no play, I decided to work there. If your doors will be resting on cross molding on the bottom, like mine are a the the top, figure out how much of the molding you want to cover and start from there.

It's helpful to know the heights (and width, if you are making your doors- My doors came with the armoire, so I already knew they fit together across the space) of your doors, as this helps you to determine how much you want to overlap areas of flat molding. I tried to install my doors so that the stretch of flat molding visible at the top and in the center of my armoire were the same size. My bottom height was determined for me, as the door shut up against the bottom of the shelf. But by installing the bottoms doors first, I was able to use the top of the installed lower door to figure out where to install my top doors.

It sounds really complicated, but it helps a ton to know all this stuff before you start drilling holes in the frame. Take your measurements and make a plan. Start with the most obvious set of doors (the ones that require the fewest decisions) and then keep adjusting from there.


10. Dry fit your doors on the armoire. You will all have your own challenges here, depending on the design of your armoire. Look for all the potential problems your door could have opening and shutting. Then think of solutions.

Because my door rested right on the bottom of the armoire, I had to create just the tiniest space between the ground and the door, so the door would drag as it opened and shut. My Lovely Assistants had abandoned me by this point to go have way more fun being teenagers than bloggers, so I had to think of some way to keep an even space held level all the way across the bottom cabinet, while I marked it. This took some thought. The guys on YouTube would probably tell you to have a friend help you hold the door, with a level on top to be sure it's straight. While the friend is hold the door steady, you could mark the holes.
I thought of something else, something brilliant! when I walked upstairs and saw my messy table.
Junk mail! It was thin, but had just enough thickness to create the perfect amount of space between the base and the door for the door to slide, but not leave a huge gap. So I put the stack of papers under the door to create a gap. Then you get to reach in and mark it without moving anything. Not easy, but it works.

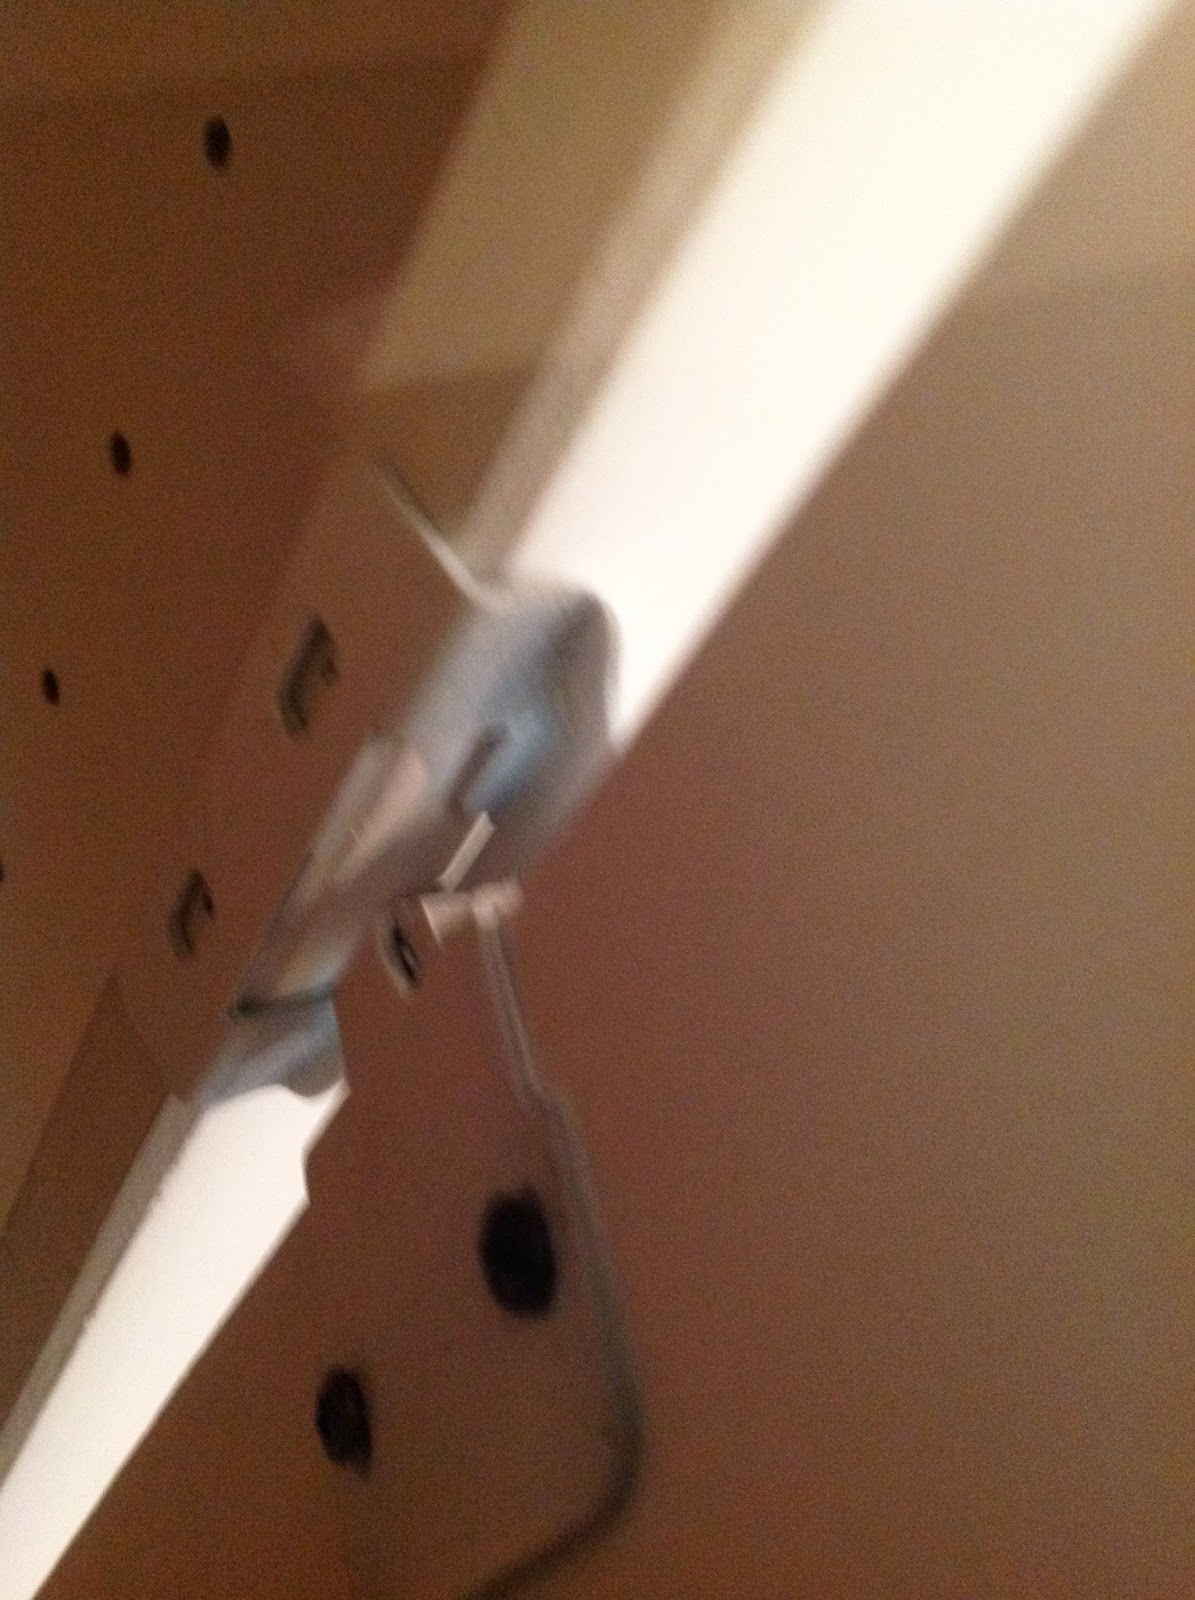
11. Once you've solved your problems for now, mark where your hinges go. You can see in the poorly taken picture to the left how I marked in the center of the oblong hole. Well it was the center before it slipped down. I shot this with my iPad while holding the whole door up with my right hand by one hinge. Hey, I'm in my 40's. I gotta live on the edge somehow.

It works well to mark all your hinges on a given door at the same time. But make sure you realign everything every time you move or slip. And check it again before you drill.

12. Drill your holes and start placing your screws. If you've never done this before, you just put your drill right up to the mark and drill a straight hole into the mark you made. You should still be careful, but you don't have to worry about drilling through the same way you do on the door fronts.

I always start with the top screw in the top hinge, to help hold the weight of the door for the rest of the screws. Then I add one screw in the bottom hinge. This frees you from holding the door in place.

In fact, I didn't add the other screws until I was done installing all the other doors, just so I could easily make any needed adjustments. Just don't forget to go back and add any missing screws when you're done adjusting everything.


13. Using the ALL same methods you used for steps 10-12, install the opposite door. Remember to only do one screw per hinge for now.


14. When both doors are attached, shut them and see what happens. Then make adjustments so they aren't too close or too far apart. This is what the oblong shape on the hinge holes allows for.


The gap between the doors should be no wider than this. And maybe even a hair smaller.
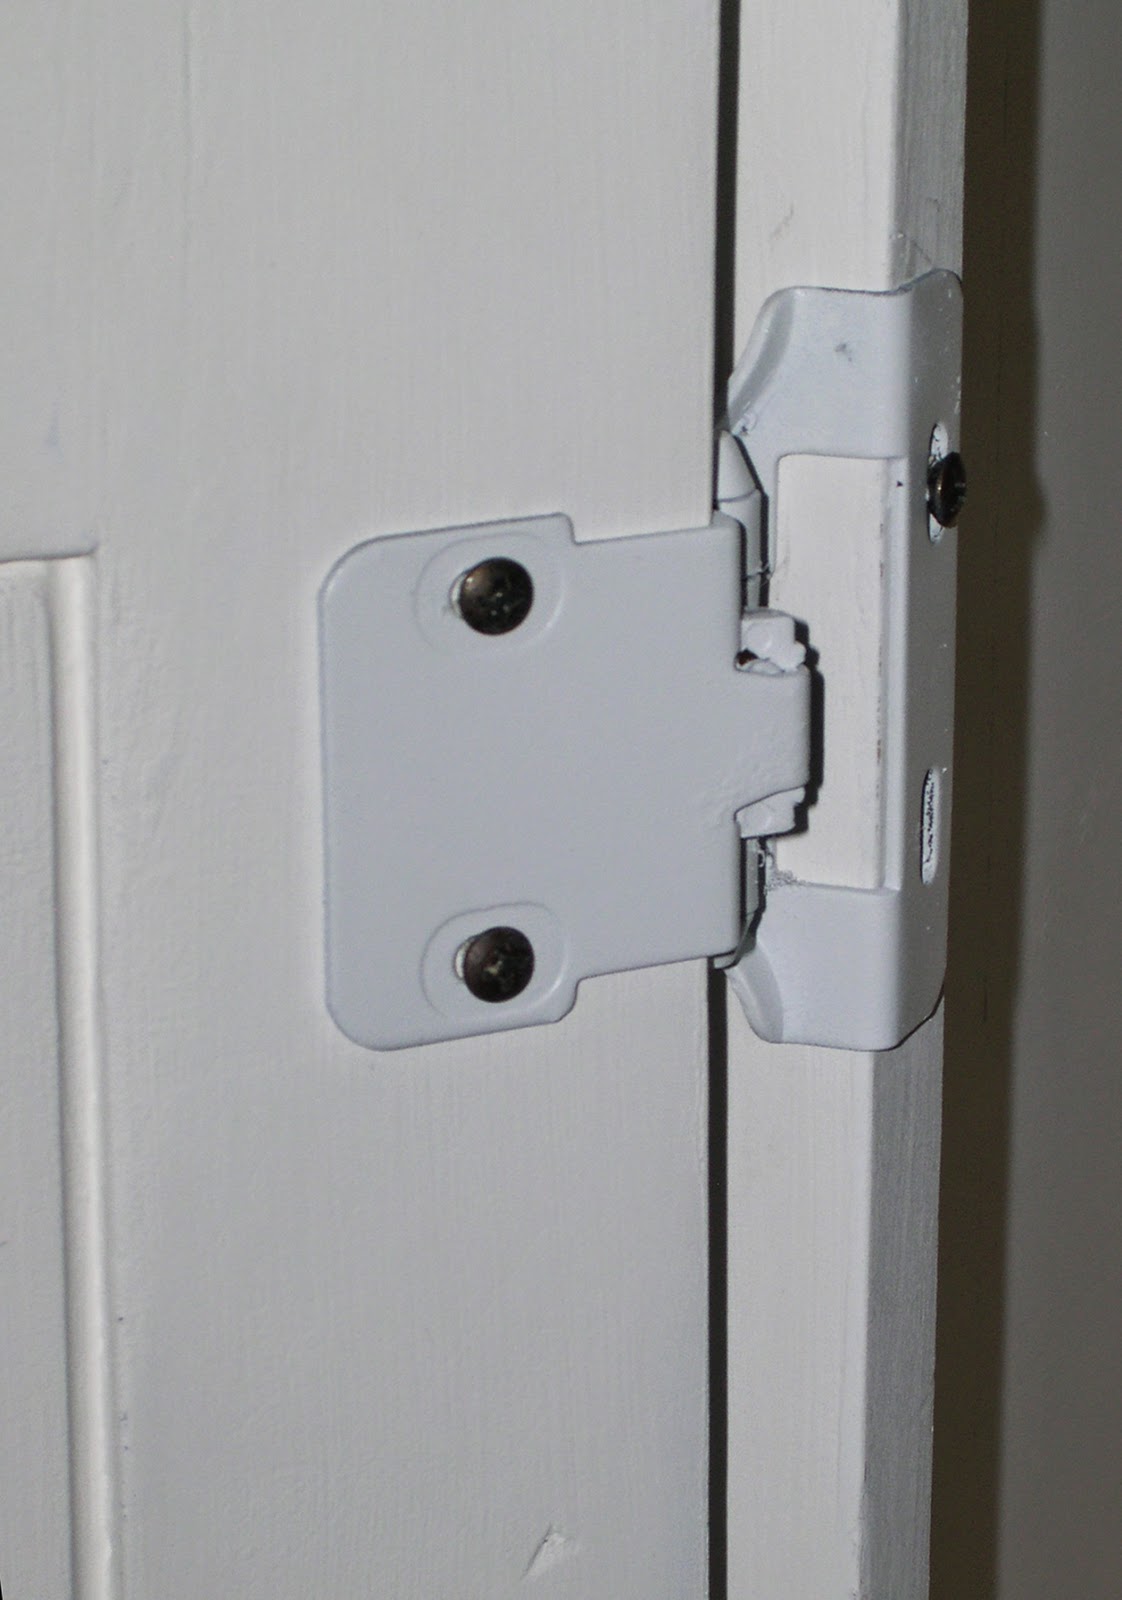


You can adjust how close the doors are to each other by loosening the screws on the door side of the hinge slightly, and moving the door closer or further from the armoire. Sliding the door towards the armoire body will make the gap bigger. Sliding the door away from the armoire will make the gap smaller. When you have made your adjustments and the doors shut the way you want, tighten down the screws again.

You can make similar adjustments with the height of the doors. Loosen the screws on the armoire side of the hinge and raise or lower as needed to allow for clearance or to align the doors on the top or bottom. Just remember to tighten the screws again after you make any changes.


At this point, I had both bottom doors on, and adjusted. Now I had to figure out how high or low to hang the top doors.

15. Measure the remaining gap and figure out where your remaining doors should go. I also measured everything between the top of the lower doors and the bottom of the crown molding. I also measured the height of the the door and the visible height of the central flat molding and the height of the top molding.

My door was 3 in taller than the gap. And the flat moldings I was working with were 2 in on the top and 2 3/4 in in the center. I wanted to have an even amount of each flat molding showing, so I opted to cover roughly 1 in on top and 2 inches on the bottom. I have no idea how this worked out, but I ended up with 1 1/2 in visible on both flat planes.


In this very elegant and flattering picture you can see how I lined everything up with where I thought it should be. Then I braced the door with one hand and my thigh and picked up the measuring tape I had sitting inside the armoire, locked at 4 in to measure both of the gaps. Once things were perfect, I put down the tape measure, grabbed a pencil, which was also laying inside the armoire, and reached inside without moving anything and marked the first hinge I could reach.


In this really terrible and poorly focused picture you can see my pencil marks. But they worked. From these you can hold the door with the hinges open in one hand and finish marking the other hinges with the other.

Once again, this is where the You Tube guys would tell you to get a friend. DK had offered to help me the night before, but it was about 6:30 am and I didn't want to wake him up or wait for him. So I just employed my tripod and timer and figured it out as I went.


16. Drill your holes. Notice the exceptionally straight positioning of the drill. That is a good thing. And probably just luck mixed with paranoia. It does help a lot though if you drill straight holes. Then your screws go straight in and you don't get screws at weird angles that have a hard time tightening all the way down. That's the kind of thing going on with this piece when I got it.


17. Screw in your hinges. Once again, easier done with another set of hands. I braced the door on my leg and held it with one hand while feverishly screwing it in with the other. No sniggering, you silly people.

And I started with one screw in the top hinge. Then I put one in the bottom hinge. Then I did one in the middle. It just makes the door more stable to do it that way.

Once you get screws placed in all three hinges, you can start on the other side.


17. Make sure your doors line up. I am super uptight about this kind of detail. it would drive me crazy if I looked at the armoire and the doors weren't lined up nicely, all level and such.

There are many ways to do this, I'm sure. The method I chose by myself in the basement at 6:30 this am was: line up the second door with the first door, making sure it was connecting with the side of the amoire that the hinges would screw into. Once the doors are aligned and look level-ish, open the first door quickly and mark where the other door's hinges should go.

If you are upset by this method, you could double check it by using a tape measure and level and then you'd be sure it was right. I jut needed it done. I've been working on this project for over two weeks now.


18. Mark your holes. Here I'm rechecking the markings on the door. The first time I did them, they seemed a little too close to the edge. even if I seem like I cheat things a bit, I always double check if I even doubt myself a little.

I was right to check. I was too close to the edge. Crisis averted.


19. Drill your holes and attach your hinges, top, bottom middle. You guys are pros at this now.

20. Close both doors and make any necessary adjustments up down, in or out to the hinges. You know what to do. Loosen screws, move door panel or loosen screws, move entire panel. Re-tighten everything. Done.


21. Now you can go back and add in all the second screws for each of the hinges. It may seem like a lot of work, but just think how much trouble you saved yourself when you made those little adjustments without all those extra screws in place.


22. Shut the doors and congratulate yourself on a job well done! Now go to Hobby Lobby and get yourself some amazing handles or pulls to jazz it up. You deserve a treat for doing such a great job.


I would rate this project as "medium" hard. Mostly because there are a lot of details involved and it is way easier with two people. But if you think it through before you drill holes, you can totally do it. And this is a very long explanation for something that will seem a lot more straightforward once you are doing it. I just wanted to cover everything so I'd remember to tell you all the tips and tricks I learned along the way.

Sadly, my armoire still has many steps until it's finished. But the only thing I'm telling you now is that I'm giving it a tattoo. With an overhead projector. Yes, folks. I have an overhead projector. And yes, I did take it out of my neighbor's trash pile. 

But that's another story for a different day...

Talk to you soon,
CM Shaw

Thursday, June 12, 2014

How to Keep Walking

Have you guys all seen the movie "Eat, Pray, Love"? 
Or read the book by the same name? 


The one where Julia Roberts spends three months in Italy eating, three in India praying at an ashram, and three in Indonesia learning to love again? I watch it whenever I can't deal with my life in a major way. Or I read the book again. I think I've read it two or three times now. There is something transcendent for me, watching this woman wander the world to find herself. I would love to do that. And maybe I will sometime, but that time is certainly not now.

Being so well versed in both the written and visual forms of this story, I have begun to notice differences in theme between them. The most notable is Julia Roberts talking about a ruined fort she goes to in Rome in the movie version. She's talking about how the fort has been through the cycle of being built and used and abandoned several times over the course of history. That part is in the book. The part that I like best that is NOT in the book is the line "Ruin is the path to transforamtion."

Ruin is the path to transformation.

Can you feel the power of that? It completely knocked my socks off the first time I saw the movie. I think I wept unabashedly, right there in the theater. Thank heavens it's dark, so you don't have to make your Julia Roberts' inspired bawling quite such a public experience, even though you are totally in public. I muffled my sobs in my sleeve and blindly dug around in my purse for a gum wrapper or Target receipt and pen to write the quote down.

I started thinking about it again recently, in the wake of ruin.

The short story is, we got a dog. 


We loved the dog. The dog started growling at and biting my kids. We got  trainer. The dog didn't change. The dog bit my youngest in the face. We returned the dog to to pound.

This experience completely destroyed me. Completely. 
I lost a huge part of my trust in God. 

We had prayed as a family, right there in the pound, before we brought this dog home to know if it was the right one for us. And we all felt a resounding "Yes." My 11 year old had been praying every night for a year for a dog, and that she'd have the patience to wait until it was right. My youngest had tried to overcome her fear of dogs and had begged me, "Can we take her home, Mommy?" only to be bitten in the face by the dog after 5 weeks of doing nothing wrong and everything right. (Don't worry. She was not majorly injured in the incident as the dog had not bit to hurt, only to warn. Just some very small bruises.) That night she looked at me with tears streaming down her face and said, "Mommy, I forgive her. We can just try harder. Please, please don't take her back." 

I couldn't bear the anger I felt. How could He do this to us? To my kids? We tried to be so smart and so careful. We did everything right. And still it ended so sadly. My heart broke into pieces more and more as the days wore on. 

Depression is an odd companion for me. I am a fairly high energy person. with a great zest for life. Yet here I was wondering if everything I had experienced up to this point was just a mean spirited joke. Soon the list got longer. I threw in my jump into professional art, my business running the barn sales, all the changes I had made to help my life at home go smoother, all things God had inspired me to do that had required huge sacrifices on my part and were showing very little return. I sat and sighed, and forced myself to get small things done like folding laundry, simply because I knew that having that chore done would lighten at least a small corner of the darkness I was wrapped in. I think it was about here that I realized that this conversation was no longer about a dog. 

I didn't get any large answers for a while, though I looked very hard. So I just kept walking. And by "walking," I mean I remembered that this is the year of "Creating Space." And so I started creating space again, because I simply couldn't bring myself to do anything else.

I finally mailed a table I painted 2 years ago to my sister, along with her birthday presents. The package got there exactly one month to the day after her birthday. I mailed some lovely children's clothes that my kids had outgrown to my youngest sister. I had crammed them in some random box and showed it in a corner about 3 months earlier. So I found a better box, folded things nicely, included a present for her impending birthday (this gift would be a month early) and dropped it all in the mail. 

I noticed that each time I got to things, and pushed them forward, a little of the darkness waned. I was still really, really, mad. And I didn't trust God farther than I could throw Him, but I knew that forward was the only way I could go. So I looked around for other things that were In The Way.

And guess what? I found about a million things to do. That's why I haven't posted. I have been cranking away like crazy on all the delayed projects. All those things that were great ideas at the time, but that I never had the time or money to complete. So they just sat there looking at me, like guilt and failure. All of my ruin. 

Now all of it is slowly turning into opportunity. And new ideas. And material for the blog that will keep you guys entertained for hours. Here's just the smallest peek:


And there's so much more. I have so much to show you and tell you.

But the point today, isn't the projects. The point is the "walking." I kept moving forward, following something I trusted, even if I didn't trust God. And eventually after a lot of thinking, and a lot of praying, and a lot of doing, I unlocked what was really going on. I found a fear deep, deep in my heart, that I had been chewing on and crying about for several years. Because of the dog, I stopped trusting God. And once I stopped trusting God, I really started digging through the garbage of my heart. And in the darkest place of all, where I felt completely tricked and abandoned and used by those I care for most, I found the real shard of glass. The source of great pain and self doubt. 

And so I picked it up and looked at it in the light, while I built and painted and cleaned and mailed. I thought and thought about it and felt what I needed to feel. And cried. I cried a lot. 

And I talked to good friends who have known me a long time and didn't have to be told the back story. And they looked at the shard and commented and helped me see some new options. 

And one morning, I realized I had all the pieces in place and the puzzle was already solved. And that while I was doing the work, making myself think and pray and keep moving forward, that God used my hands to put things where they needed to be. 

My shattered heart is whole again, in a way that I didn't think would be possible right now. I know exactly who I am and where I am going in my family, in my creative life, and in my larger world. And God took the extra time to thank me for all the work I have done to myself, by showing me from sources too varied to be doubted, what an amazing person I have become. My ruin has been the path to such an astonishing transformation. Every where I look, my weak places have become strong. And I am renewed and ready to go out and serve and create.

And today, of all things, I got an email saying that the Northern Virginia Lab Rescue is ready to start trying to match us with a dog. 

Friends, keep walking. The answers will be there, I promise.

Talk to you soon,
CM Shaw

Friday, May 16, 2014

Three Vintage Vixens at Lucketts Spring Market


Buckle up!


IT'S LUCKETTS SPRING MARKET BABY!
Saturday and Sunday, 10-5
Lucketts, Virginia 


 Come head to small town Virginia's rolling hills with us to find some treasures. 


There are three of us working together this year so we decided on a new name. Look for the Three Vintage Vixens booth near the rear entrance by the large parking lot (and lake, recently).


You know these ladies too. Sharon of Hand Picked Art is my longtime business partner with the Branches Barn Sales. Margaret is last year's vintage dealer and the idea lady behind Asher Hill Farm. Remember her amazing barn and bed shed? (click here to see a detailed look at her farm)


Well, the truck's all loaded and the rain storms have finally stopped. We spent the last few days doing a bunch of this:


Because of the rain, I don't have polished pics of the booth for you, like Miss Mustard Seed. But I do have a few little sneak peaks: 


Those are just the teensiest peek at what we have for you. There is a 20 x 10 foot tent packed (think "no breathing space") to the gills with great vintage finds. We're not quite sure where we're going to put it all. 

Several things have "Perfect Project Pricing", which is our way of saying "We know this has great lines, but it needs work." So we are pricing it to M-O-V-E! I think you'll be impressed.


And I have a give away!!! I have free samples of Webster's Chalk Paint Powder for the first 13 of you who come to the booth and mention the blog or CM Shaw Studios. As an extra bonus, we will be doing a drawing to give away a free large tin of Fiddes & Sons Clear Wax, also from the good folks at Webster's. (read more about how I came upon these goodies here). All you have to do is leave your email in a jar. My 6 year old will be blind-folded and pick the winner randomly.

So come join us! The rain is supposed to be on it's way out to sea, so think "Sunny and 70's" thoughts. And we'll see you there.


Lucketts Spring Market

THIS Sat. May 17 - Sun. May 18, 10-5

42350 Lucketts Road, Leesburg,VA 20176


Tuesday, May 13, 2014

How to make a pallet wood mirror...if you already have the back and some Webster's Chalk Paint Powder.

This project idea came about from some very disparate sources. In fact, this whole post came about through the odd juxtaposition of me having too much crap stuff with "potential" in my studio, (surprise, surprise), an unexpectedly generous donation, and me tripping over a piece of wood. 

Let's begin at the beginning, shall we? Julie Andrews thinks that's "a very good place to start." 

Jump back 2-3 years, when one of my friends was moving. I had been helping her clean walls and bathrooms, while she was prepping for several weekly garage sales to pare down the amount she would have to move. After the third or fourth garage sale, she started to get a little desperate. Knowing I was "crafty", she brought over some things that hadn't sold, but were pretty nice. In the pile were two kits to make smashed tile mirrors. Think wooden board with molding around the exterior edge, then an open place all the way around the mirror and molding framing the 8x10 in  mirror in the center all made out of raw pine. The idea was to smash the cobalt blue and white tiles and then thin set and grout them in some pleasing pattern around the outside of the mirror, circa 1997. All I saw was a woman who needed someone else to deal with all this stuff, so I took the mirror frames and a bunch of other stuff as an act of mercy. I'm sure I just shoved them somewhere out of the way in my studio and forgot about them.


This is an "in process" picture, as I forgot to take a "before" pic. 
But at least you all can see what I'm talking about now.

Let's fast forward to February of this year. A fellow designer friend and I get this great idea to do a nest and egg painting workshop where we will teach how to make chalk paint from latex and then use various glazing techniques to make the faux eggs look real. I love this idea and start shooting emails to all the chalk paint companies I can think of to get samples for my students to try. Of the eight companies I emailed, only one even bothered to respond. Webster's Chalk Paint Powder.


And respond they did. They sent free samples of their Chalk Paint Powder mix-in for each of the 14 potential student as well as a large tin of Fiddes & Sons wax to be shared among the class. Folks, this was an amazing corporate response for this little blogger. And it was so perfect for my workshop!


But I had to cancel the workshop, for reasons too numerous and annoying to discuss here.

In an effort to repay the good people at Websters for their generosity, I started wondering what amazing project I could do to post about their product. I thought of redoing vintage frames, or boxes, but that just didn't seem sexy enough. And I didn't have room for another piece of furniture. 

One day,  I was mad at my kids for something, so I went into the studio and started whacking away at a pallet I was trying to break down. If you are mad at your kids, I highly recommend this way of releasing negative energy. It is so satisfying to beat the crap out of the wood rather than the child. After removing several boards by brute force and discarding them randomly, I took a step back. 

You know that moment in a James Bond movie, when the villain accidentally steps just a hair too far off the edge of a cliff and you see the whole weight of his body shifting towards the abyss? And you know at that second he is going to go careening off the edge to his doom? 

Yeah, that's what my foot and body did as I tripped over one of my hastily discarded boards and came crashing to the floor. It was so gloriously out of control and completely awkward, that I just burst out laughing. While I was cracking up, my eyes fell on the box Webster's had sent me. My mind put two and two together and I thought, "I could use the Chalk Paint Powder with all this latex I have laying around and all this pallet wood and make super cool mirrors to sell at Lucketts!"


So that, friends, brings us to our project today.


How to make a pallet wood 
surround for a mirror:


1. Have a desperate, moving neighbor dump a bunch of craft supplies in your lap. 

2. If this isn't likely to happen and you still want to make a mirror like this, go buy yourself a sheet of Masonite or thin (apx 1/4 in) MDF at Lowes or Home Depot and have it cut to the size you want the whole piece to be when you are finished.

3. Choose whether you want to use an existing, pre-framed mirror (you could get one really cheaply at a thrift shop or a garage sale, or there's always clearance at Target or Home Goods). The simpler the frame the better this will look, and the easier it will be to match the molding. If you decide to build from scratch, it would be easiest to purchase a pre-cut mirror at a craft store. Get whatever size you want. You could also use a larger size picture frame for the outer frame and have the backer wood cut to fit that.

4. Get a length of small, simple molding, as this will let the pallet wood be the star of the show. Decide whether you are going to use butt joints or mitred joints. Butt joints are easier and stronger, but mitred joints look better. If you are making everything from scratch and using a craft mirror, figure out the lengths you need for both the interior and exterior frames, based on the joints you are going to use, the backer board you already had cut, and the size of your mirror. I would use Loctite Wood construction adhesive and some clamps and just glue everything together. I love that stuff. 

I would lay everything out, including your mirror, before you start gluing. Get it where you want it, and then trace the outside of the mirror with pencil. Glue this down first. Then glue the mirror molding down. Then the outside frame.

If you are using a pre-framed mirror, do your best to match the molding your mirror came with, but don't stress about finding an exact match. Once you paint them the same color, a lot of the differences will disappear. All you need to build is the outside frame for the whole board. Once your frame is cut, line it up, but don't glue it down. Lay out your pre-framed mirror in the center and make sure the whole thing looks like you want it to. Trace the outside of the mirror onto your backer board with a pencil. Then glue the mirror down first, applying the glue to the mirror back and using the pencil outline to guide your placement. Once the mirror is in place, then glue the outside frame together, suing the edge of the backer board as your guide line.

Once you have the frames all measured, cut, placed checked, and frames and mirrors adhered to the backer board, you can start doing funner stuff like painting and cutting pallet wood.

5. Figure out which pieces of pallet wood you want to use and how you want them stacked around the mirror. I get weird about things like how nails line up and having the same grain patterns together, so this is an important step for me. If you're more laid back than that, then pick your boards and go on to then next step. If you have no idea what to do with a pallet, read this post first.

6. Figure out how your boards are going to fit around your mirror. Do you want them to run horizontally or vertically? I did horizontal, because I felt it showed the most of the varieties of pallet wood I was using. (ie. most of the pieces just seemed bigger that way.) I would recommend trying to avoid notching around the inner frame unless you really know your way around a table saw and jig saw. Just try to choose a stack of board that are the same height as the mirror frame. You will be able to cut the top and bottom boards width-wise to fit what's left.

See how the white board just rests right on the inner frame and the blue wood comes right up to the edge? This is the easiest way to do it. The brown board was cut thinner to accommodate everything else lining up.

7. Start measuring the boards that go next to the mirror first. I measured from the inside of the outside frame to the outside edge of the inner frame. Mark the wood carefully. Then use a mitre saw or table saw to cut your pallet wood to size. Please be very careful to avoid nails!!! Swap your wood around or turn it another way, or just remove the nail if it is in your cutting path. It could ruin your saw or kick something up in your face while cutting. The "character" of having that one nail is not worth losing an eye or replacing a power tool, I promise.


I repeated this process for all the smaller pieces of wood, placing them in the frame as I cut to be sure they fit nicely. If the were just a hair too wide, I sanded them with a 100 grit sandpaper until they fit like I wanted.

8. Once all the smaller "side" pieces are cut, get out your end pieces and cut them to length. You will adjust the width once they can fit in the frame. Measure from the inside of the outer-most frame to the other inside edge of the same frame. Remember, we are not working with the mirror frame right now. Cut your wood to fit. Repeat for all pieces that will be above or below the mirror.

I know this mirror has notched pieces and I told you not to do that (I got help from a woodworker friend) , but it also shows you how the green piece was cut thinner to accommodate the orange piece's width.

9. Once you have all the wood cut to length, figure out how much you need to take off the width. put all the pieces, short and long, in the frame where they go. Slide in all the wood that will be full width. Whatever space is left over is the width you need to cut your wood to. The easiest way to do this is with a table saw. Use a stationary guide rail and a piece of scrap wood (rather than your finger) to push your piece past the blade. Check for size and sand or re-cut if needed.
Repeat for all remaining pieces until mirror surround is full.

10. Sand all wood until smooth enough to handle. Pallet wood loves to give you splinters. I used 150 grit and then 220 grit to make it silky.

11. Now you get to paint! Woo Hoo! 


Choose your colors for the frames and the boards. If you are using regular chalk paint, like ASCP or Fat Paint, etc, then paint, wax and distress away. I didn't prime anything first. I did, however decide to try something new.

This is where the Webster's Chalk Paint Powder comes in.


I had a bunch of sample size latex "oops" paint that a friend had given me, as well as some really great wall colors left over from various projects in my home. I thought this was the perfect time to give "The Powder" a try. 

I used all different brands of latex from Valspar to Behr to Benjamin Moore Aura to Sherwin Williams between all the wood on the two mirrors. I also used Annie Sloan Chalk Paint, because I liked the colors and I had it on hand. The samples were nice because they are roughly a cup. (I didn't measure and the people at Webster's may be cringing right now. If so, sorry guys!) If it makes any difference to anyone, it worked just fine.

I am super anal about how my colors relate to each other, so I take each of the paint cans or jars and place it over the board I am going to use it on, to be sure I like how they all relate to each other. Often I think I'll love one color, only to hate it next to another one. I tweak and replace and readjust until I'm happy, then I paint the wood. But that's me. If you're lower key, just have at it.

12. Mix your latex and chalk paint powder. 


 This is super easy. You take 2 Tbsp Chalk Paint Powder and dump them in a container. Then you pour in 1 Tbsp tap water and mix them until the powder dissolves. This is a terrible picture, but it looks like this when it's ready:


Then you just pour the water/powder solution into the pre-measured paint and mix away.


When it's all mixed, you use it the same you would use and boutique brand of chalk paint. You can distress or wax or glaze or whatever your little heart desires. And it keeps for a while. I started fiddling with it about 2-3 months ago and my air tight sealed samples are still fine.

I applied one coat of each color to my pallet wood boards. 


See? The Webster's paint covers just like chalk paint. This is one coat.

I used a little different treatment to my bases, depending on whether it was the dark set or the white one. The dark set I stained the pine first. Then I painted over the stain and the whole background with blackboard paint. My plan was to rub off some of the paint with a wet rag, so the stain could show through without being sanded off. Apparently blackboard paint is harder than chalk paint. Very little came off with the wet rag. So I distressed the tar out of it with 100 grit sand paper, and sanded off all my stain, but exposed the right amount of wood. Undaunted, I just stained it again over the paint. Then dark waxed the whole thing. Whew.


This is a terrible picture again, but it give you an idea of the technique used on the darker frame. And staining over sanded paint works great!

For the white mirror backer, I used one coat of ASCP for the base and then distressed it to just reveal the wood underneath. 


14. Once you have painted everything and let it dry, it's time to distress. I usually use 150 grit and then 220 grit for this process.  I did find that the cheaper paints like Glidden mixed with the Chalk Paint Powder were a bit harder to distress than ASCP is. But I just switched to a lower grit paper and it worked fine. Keep in mind, I did not measure how much paint to powder I was using, I eyeballed it. This may make a huge difference. If it matters to you, measure to be sure you have the right proportions.


15. Once everything is distressed to your liking, wax it. I used only a single coat of matte clear wax on the white mirror pieces.( I used a matte wax on the white set called Renaissance, because I wanted them sealed, but not shiny. It's pricey though. I already had it for re-waxing my antique armoire. But you could use any wax and be fine.) The dark mirror pieces got Annie Sloan clear wax, then dark wax, then clear wax.

I was also careful NOT to wax the back. I have no idea how construction adhesive would do with wax and didn't want to find out.

16. Let the wax dry. Then glue everything together. I let the waxed pieces sit overnight, mostly because my kids had come home from school and my project time was over for the day. When I came back to it, I made sure I loved how everything looked and then started gluing. I used a board turned vertically to hold all the side pieces in place with one clamp and one clamp on each end of the top and bottom boards, because I didn't want any warping and the board already had a hint of a buckle to it. If you don't have clamps, anything heavy, left overnight would help the glue set nicely. I left the clamps on overnight.

17. Take the clamps off and add D-ring hangers and a wire so you can hang your new mirror. Drill pilot holes a little smaller than your D-ring screws into the back of the mirror, being sure BEFORE YOU START DRILLING that your screws are short enough not to come through the front of the mirror. Once you have your pilot holes, you can place your D-ring and then screw in the screw. Repeat on the other side, being sure that the two rings are level and the same distance from the top of your mirror. Add a wire between them if you wish. 


And you're done!

Can you tell which of these boards I used Webster's with and which ones are ASCP? 
Neither can anyone else. And it's way cheaper.


I can't decide if I like it better this way, or with the blue on the top. 
Turn your head upside down and tell me what you think.

These mirrors will both be available at the Luckett's Spring Market this weekend. 
Come check it out Saturday and Sunday 10-5 in Luckett's, VA. 
I promise it's worth the drive and the entry fee. 
Plus I'll be giving away free samples of Webster's Chalk Paint Powder for you to try.

Talk to you soon,
CM Shaw

PS: I was not paid for this post in any way. Webster's Chalk Paint Powder company sent me the free samples for my class and one for myself, but did not ask for a post or provide any other incentive. I just liked that they acknowledged me and and I found their product insanely useful. All opinions are completely my own. 

Does that sound like the Queen of Hearts in Disney's Alice in Wonderland?
 "All ways are My ways!"


Monday, April 28, 2014

Empty

I feel empty and sad sometimes. Mostly at times when my "Mommy" life has taken over and my "Artist" life hasn't seen the light of day for far too long. While I appreciate the value of being a mom and raising well adjusted little people into big, well adjusted people, it isn't enough for my soul to just do that. Sometimes I wish it were, and I actually know quite a few people who gain a huge amount of fulfillment through caring for their kids and managing their homes well. And I am so happy for them. If you are like that, consider it a huge gift. I am not like that. While I love to see my kids flourish, doing the day to day management gives nothing back to me. I gain little joy from my house being cleaner, other than the satisfaction that I won't look like a total loser if someone comes over. But I think peer pressure and joy are just a teensy bit different.

So what is my point here? My point is that sometimes the crappy stuff takes over. And you just have to keep dealing with it. I had to postpone my workshop at the beginning of the month and then give up all creative pursuits for the entire month. It's just how the cards fell. So I have been reminding myself that life is not "being mean to me", it's just the way things are right now. I keep trying to remind myself to look and actually see at the beautiful weather (finally) and all the flowers. I have been trying to remember to find the nuggets of beauty tucked into each moment. 

All during spring break I watched my oldest daughter laugh freely and run in the sand with an unfettered joy I haven't seen for a year. I watched my eleven year old be the belle of the ball, surrounded by happy friends at her self planned and very successful birthday party. I have watched my youngest play dress up with her best friend and fall in love with her American Girl all over again. 

And we got a dog. She is a 4-5 year old beagle/hound mix from the pound. And she is a delight most of the time. I have been relearning why I liked animals so much when I was a kid. It has been 20 years since I lived with a dog, and I had forgotten how funny and sweet they can be.

But all this beauty still hasn't been enough.

I keep finding myself in tears in the corners of my house. My heart keeps returning to numbness. I don't want to write in my journal in the morning because there is nothing creative going on inside me, only enduring. And while I am all for enduring, I'd rather live my life than just grit it out.

So I started praying. And I felt better for a little while, but the sadness returned. So I worked some more and served some more and exercised some more. And they all worked until I stopped moving. Then I would just start crying again. And the doubts would hit that no one, not even God valued me being an artist or a blogger. That this period I have been going through for the last 3 years would never end. That something else would ALWAYS be more important than my dreams for myself and that all I would ever end up being would be an over weight mother with an eternally dirty house. 

I think this is the point when I threw myself on the floor and started crying hysterically. You're glad you weren't there. And so is DK. It wasn't pretty, and fairly reminiscent of a 4 year old's tantrum. At some point, I realized that this was not helping me and that the carpet needed to be shampooed sooner than later, so I got up and headed for the shower.

I don't know if I've ever told you guys this, but I have the Shower of Magical Knowledge. Seriously. It is the place where God talks the clearest to me. I know that sounds crazy, but you guys already know that about me, so I figure I might as well tell things as they are. 

So I get in the shower. And I start crying again, as I keep thinking how angry I am at God. Then I start screaming, I mean really screaming at the top of my lungs in my magical shower asking God why he made me creative, if I was never going to be able to use that gift? Why did He tell me to blog if I was never going to have time to post? Why did it feel so oppressive when I don't have any "real" problems? I screamed so loud, my throat started to hurt. And I have to be honest ladies, it actually made me feel better to scream at God, not because I wanted to accuse Him really, but mostly because it got all that pent up anger out. Once I had expressed all my venom, I apologized for my outburst and  finally got to asking the most important question, "Lord, what am I supposed to be learning from all this?" That, my dear friends, is when I got an answer that I could hear.

Sometimes the answer to our dilemma is to paste on a plastic smile, pray for the strength we need, and just wade through the challenge. Sometimes that doesn't work. And that's what happened here. I wish I could always remember the incredible kindness of God, but sometimes I can't and I get wrapped up in my fears and layer on my negative echoes of the past. I blame God for not "blessing" me even when I'm doing everything thing He asks. It is only AFTER I express all my pent up fear and misery and anger to Him that I can come back to my senses and feel the peace He gives. 

This, friends, is how you give your sorrows to the Lord. You talk to Him directly about them. Don't worry. He can take it. And then, if you need to, you apologize. He will take your fear and shame and anger and worry from you. And then, when you are ready, He will teach you what you need to continue on in joy...for a while. Keep in mind, this is a process.

My answer this time was that I am in a period of learning, rather than producing. I need to look at what others are doing. I need to think about art, I need to understand more about art. I was told this same thing several months ago, and I had been doing very well with it and was very happy, but then I forgot and got lost. With that simple reminder, things in my life lined up and fit into place again. I am ready to keep going forward with enthusiasm. As a special bonus, (maybe I really AM being as good as I told Him I was) He showed me what a profound impact the service I had been providing at the expense of my art time had made on my children and others I had given it to. Nothing quite like being shown just how "worth it" your sacrifice was. 

At the moment, my heart is full of gratitude,

  •  for a God that loves me enough to take a yelling at and still re-balance me because He knows it will help me become my best self, 
  • for the bounty I have of beloved people and lovely possessions, 
  • for the fact that even when I was suffering, I was smart enough to notice the joy and beauty around me. 
  • And for this blog, where hopefully you all will benefit somehow from my foolish ramblings and poor, (or sometimes good) choices.

You guys ever yell at God in the shower? I'd love to hear your experiences.

Talk to you soon,
CM Shaw